You press Command + Space, type the name of a file you can literally see on your Desktop, and… nothing. Try again. Still nothing.
If that sounds familiar, here's a fix worth trying: rebuild Spotlight's search index. You can do it in System Settings, without touching Terminal.
Think of the index as your Mac's address book for files. When it needs updating, search can miss things that are still there. Rebuilding can help, although it won't fix every search problem. Apple explains how indexing works.
First, check these two things
Open System Settings → Spotlight (called Siri & Spotlight on some versions).
- Are the results you want enabled? Look for categories under Results from Apps, Results from System, or Search Results, depending on your macOS version. Turn on the ones you need. Apple's category guide.
- Is the folder already excluded? Open Search Privacy. Anything listed here is hidden from Spotlight searches. If a folder you want to search is already there, remove it with – and click Done. Keep any exclusions you deliberately set up. Apple's privacy guide.
Rebuild the index, step by step
Here's the process on my Mac, with screenshots of each step. The yellow arrows point to the controls you need. Labels and layout may look a little different on your macOS version.
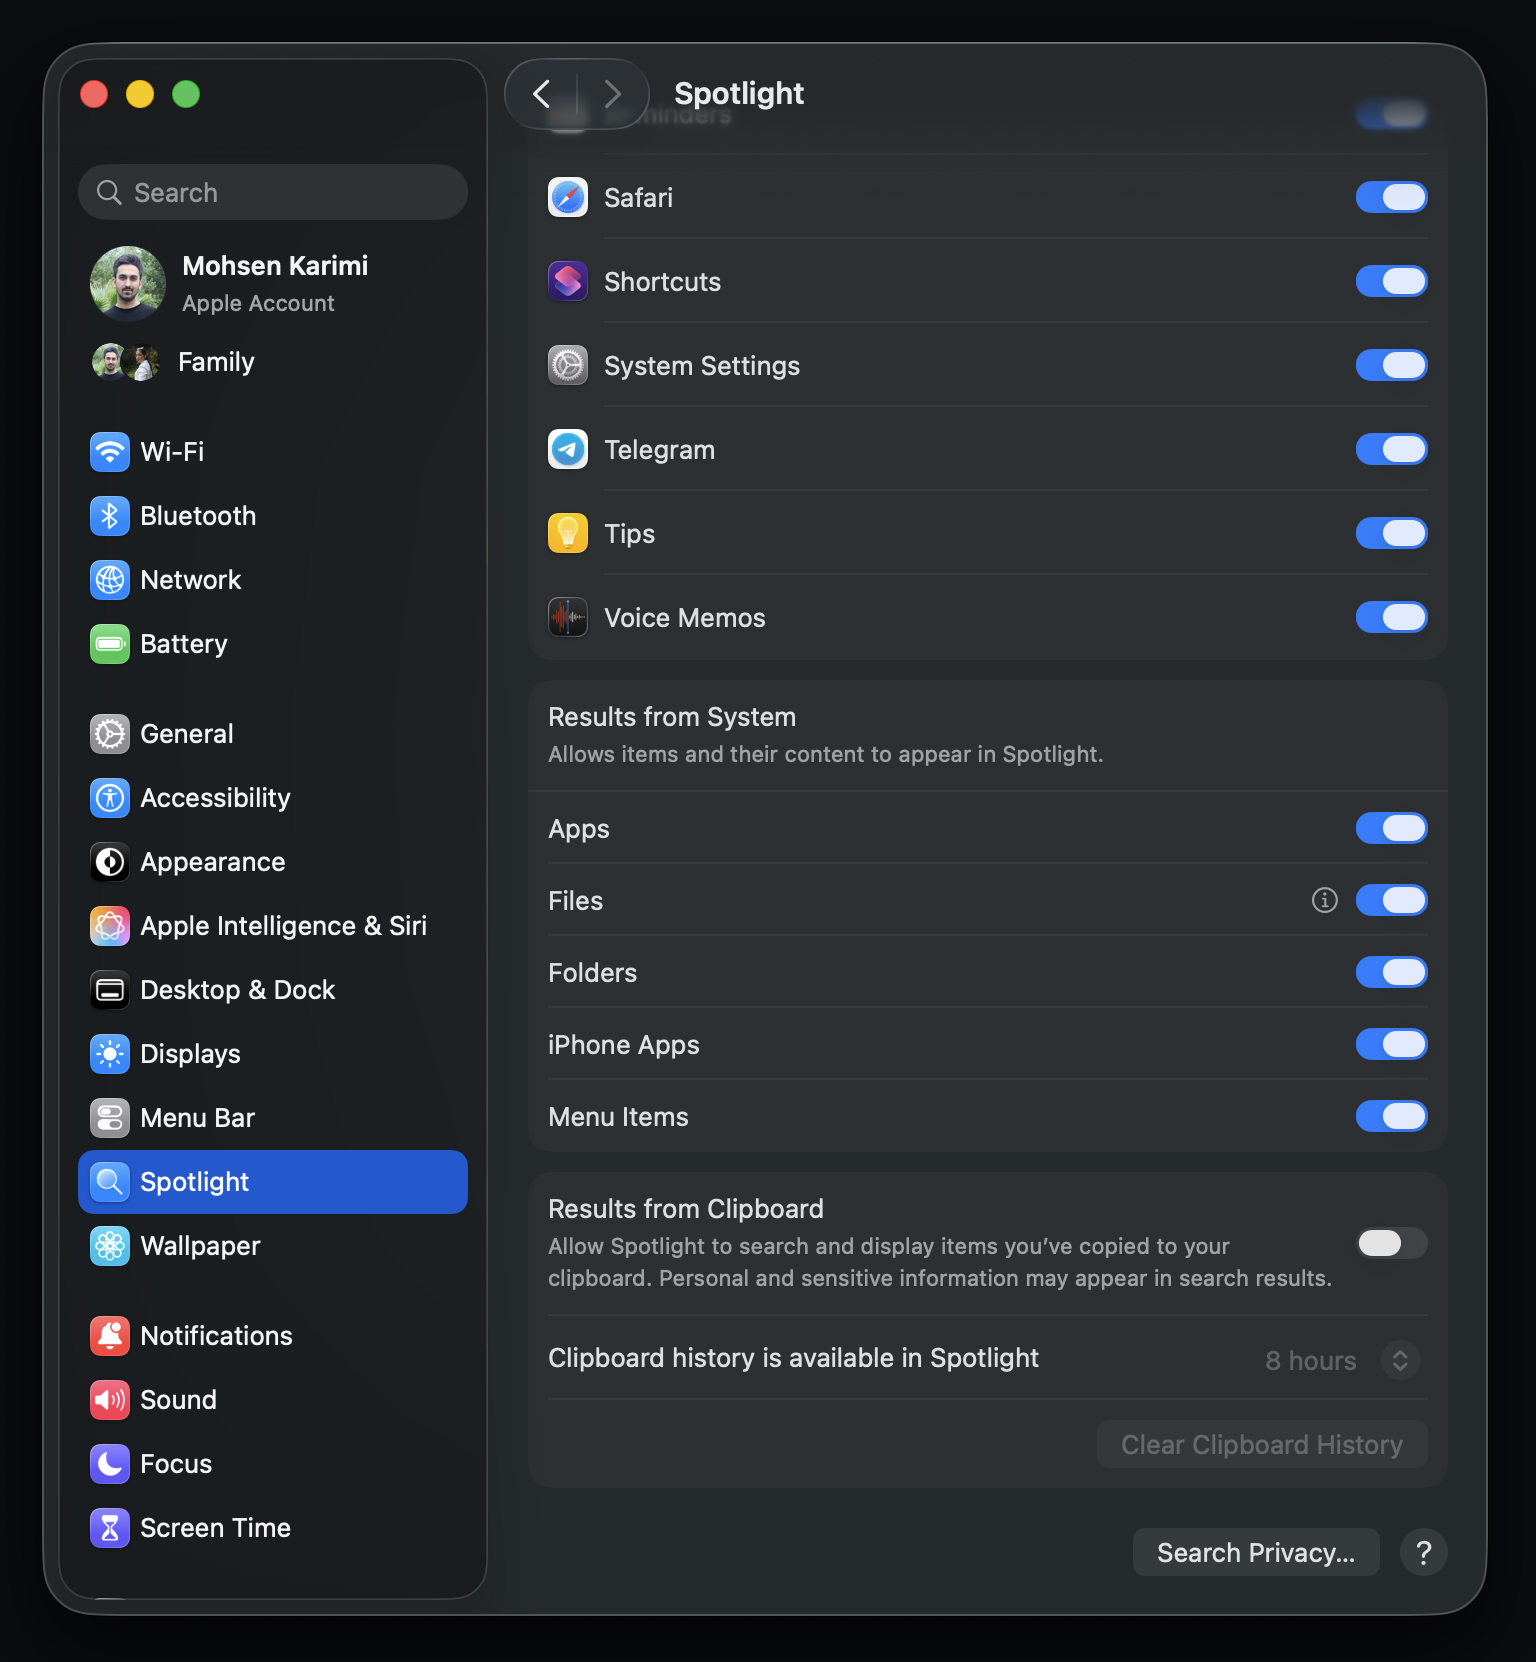
1. Open Search Privacy
In System Settings, select Spotlight in the sidebar, scroll down, and click Search Privacy. Some versions call these Siri & Spotlight and Spotlight Privacy.
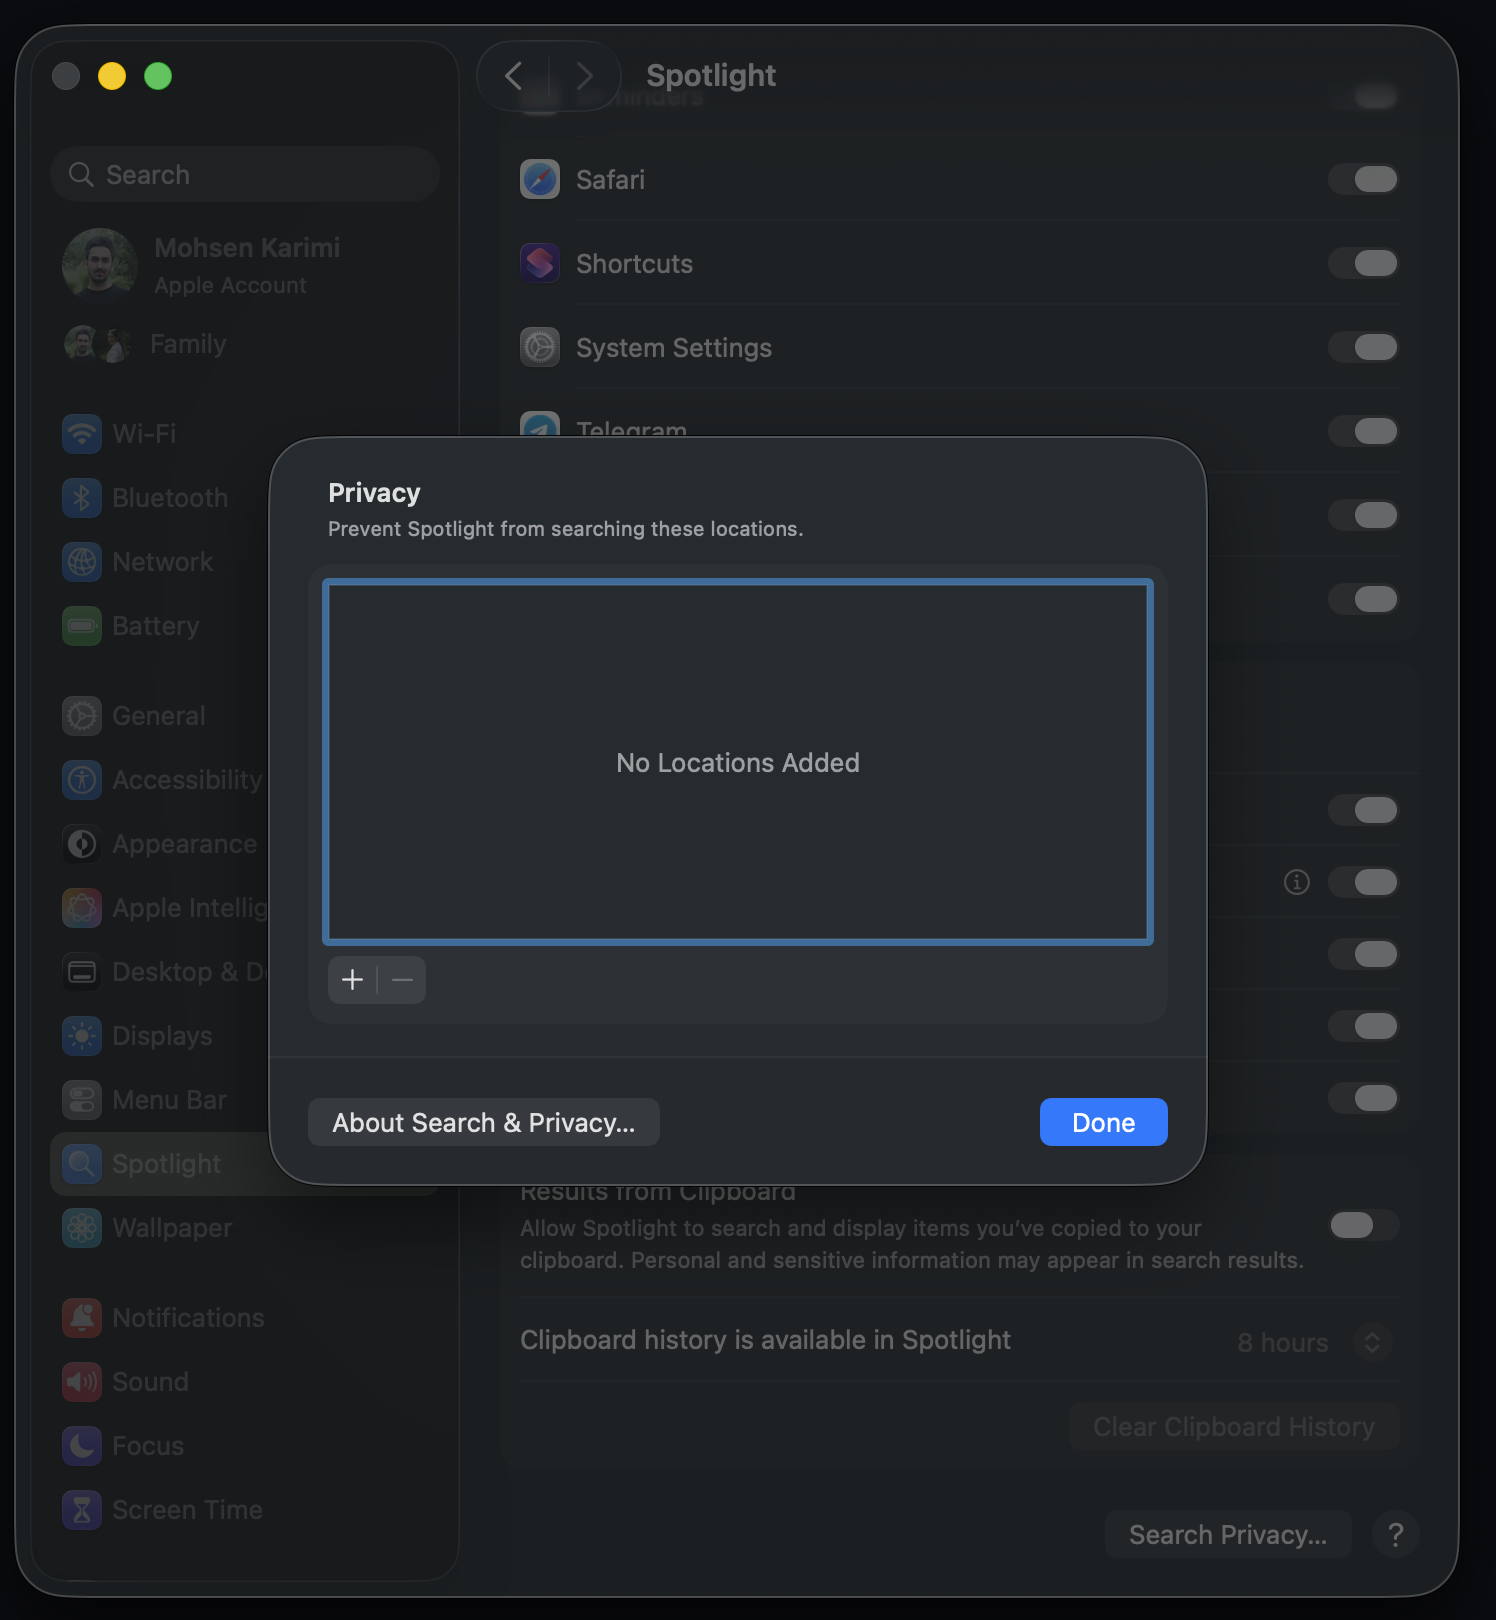
2. Click the plus button
This list contains the locations Spotlight is prevented from searching. Click + at the bottom left to add a location temporarily.
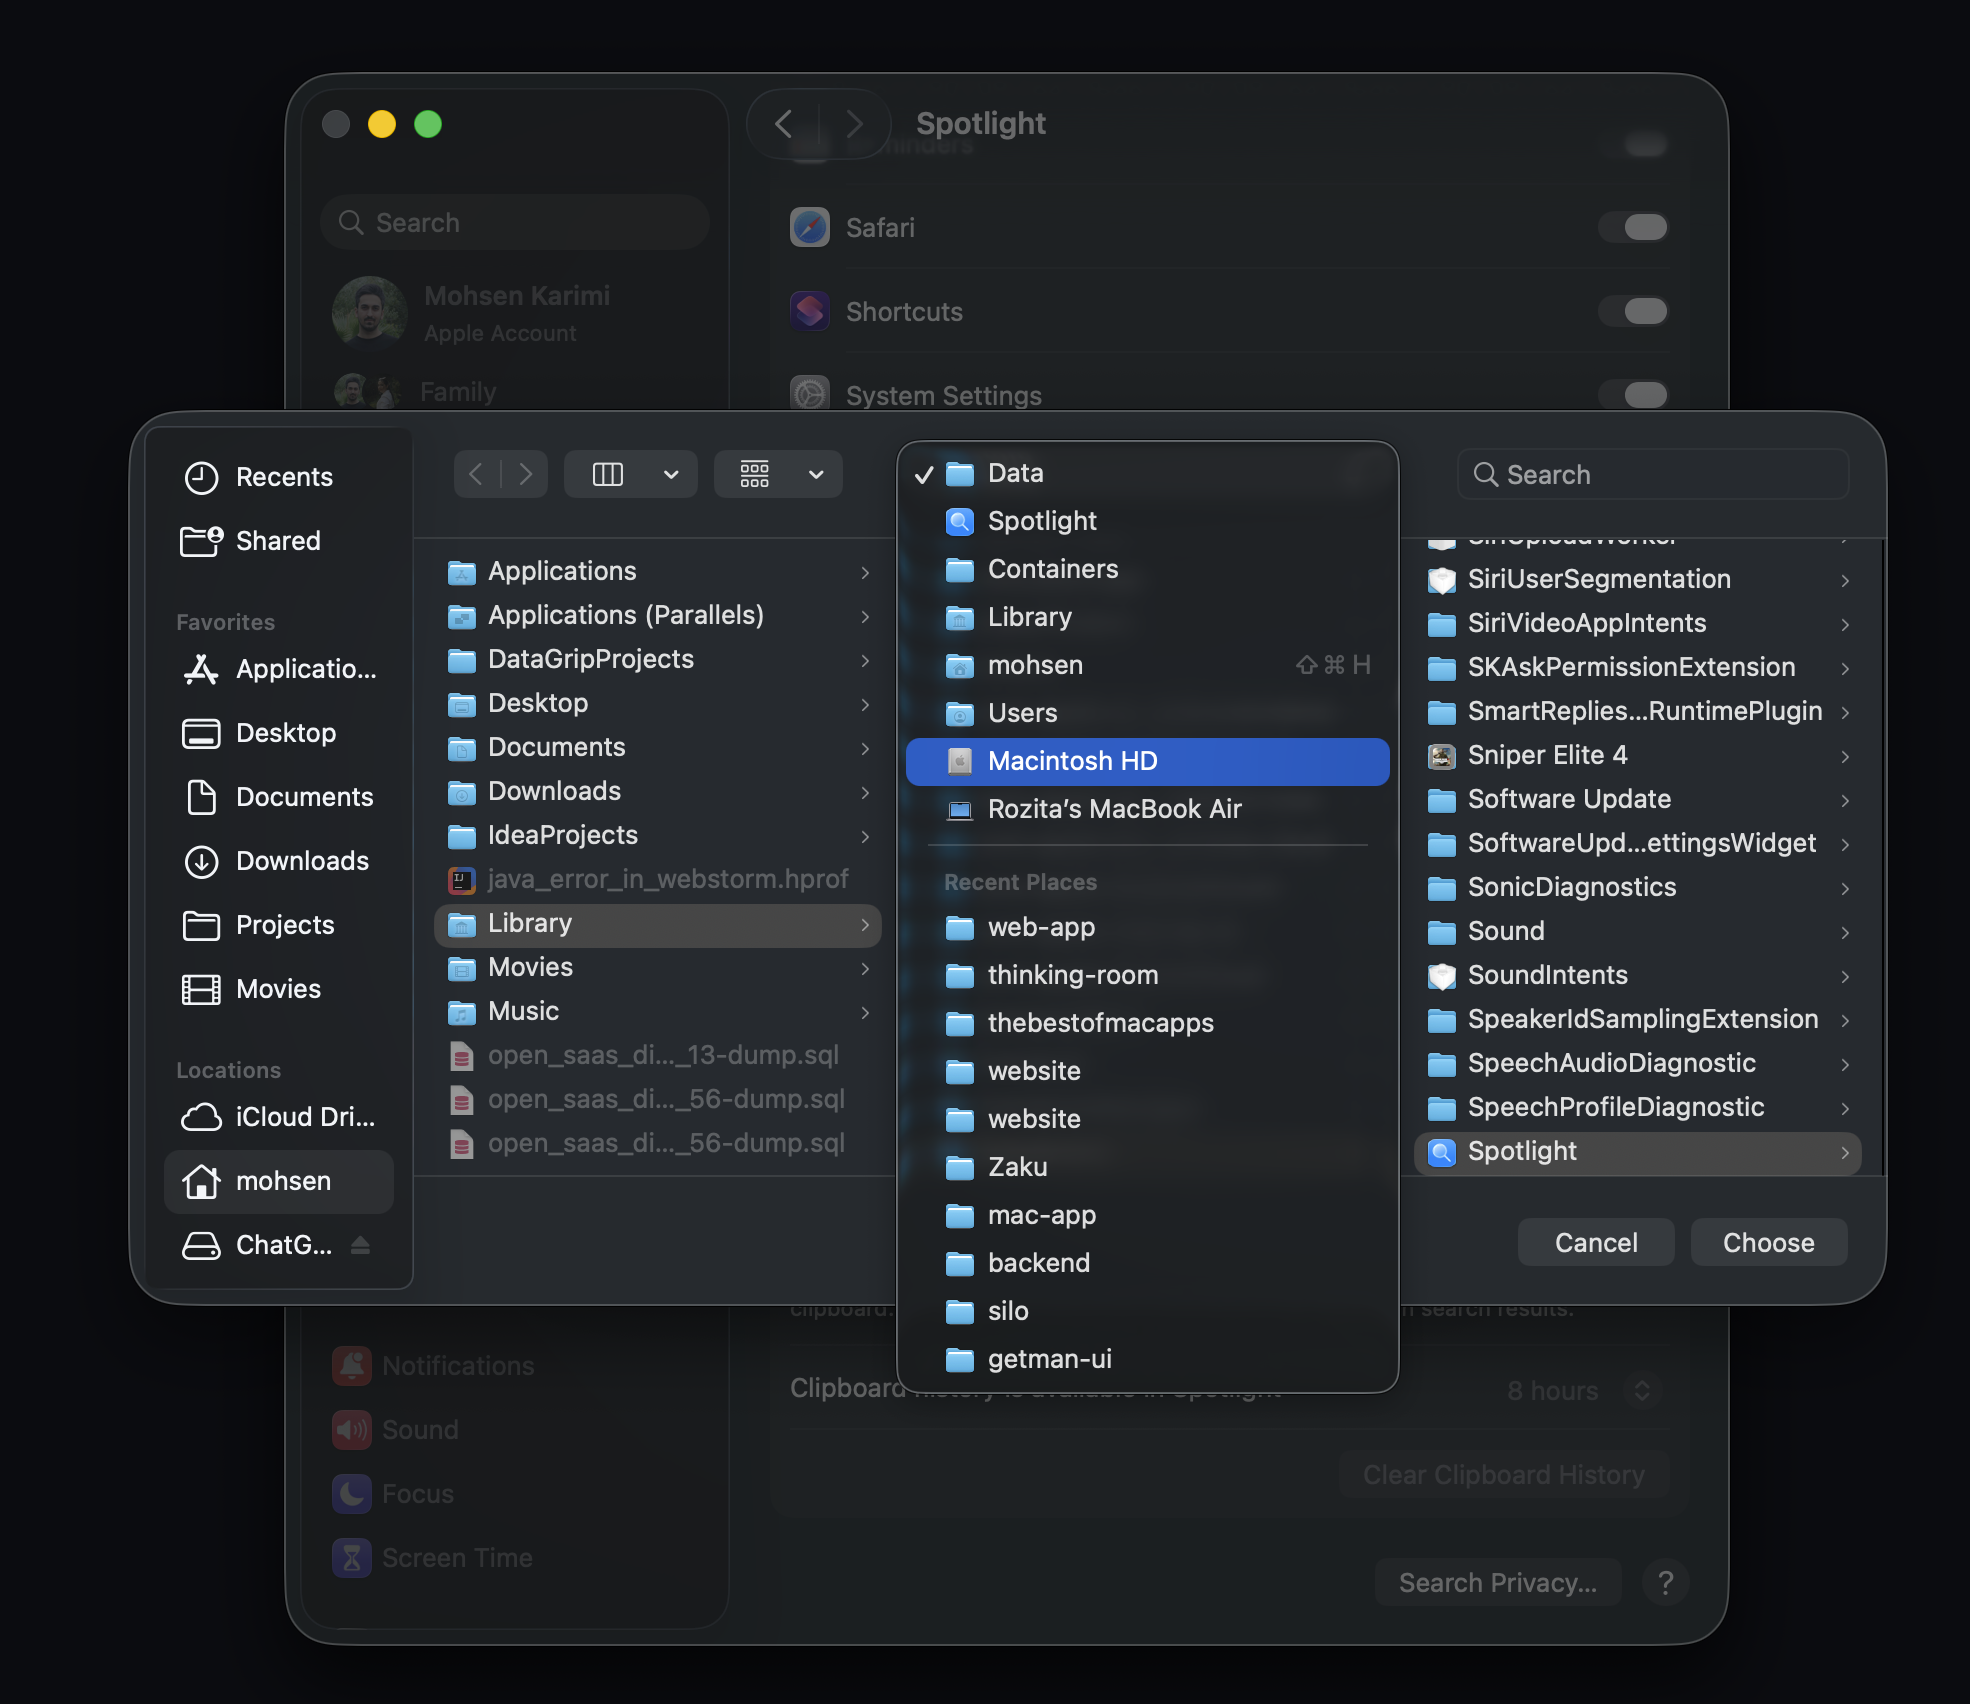
3. Choose Macintosh HD
If search is missing things across your Mac, choose your startup disk, usually Macintosh HD. In the file picker, open the location menu at the top and select it, as shown below. Then click Choose and confirm if prompted.
If only one folder is affected, you can choose that folder instead.
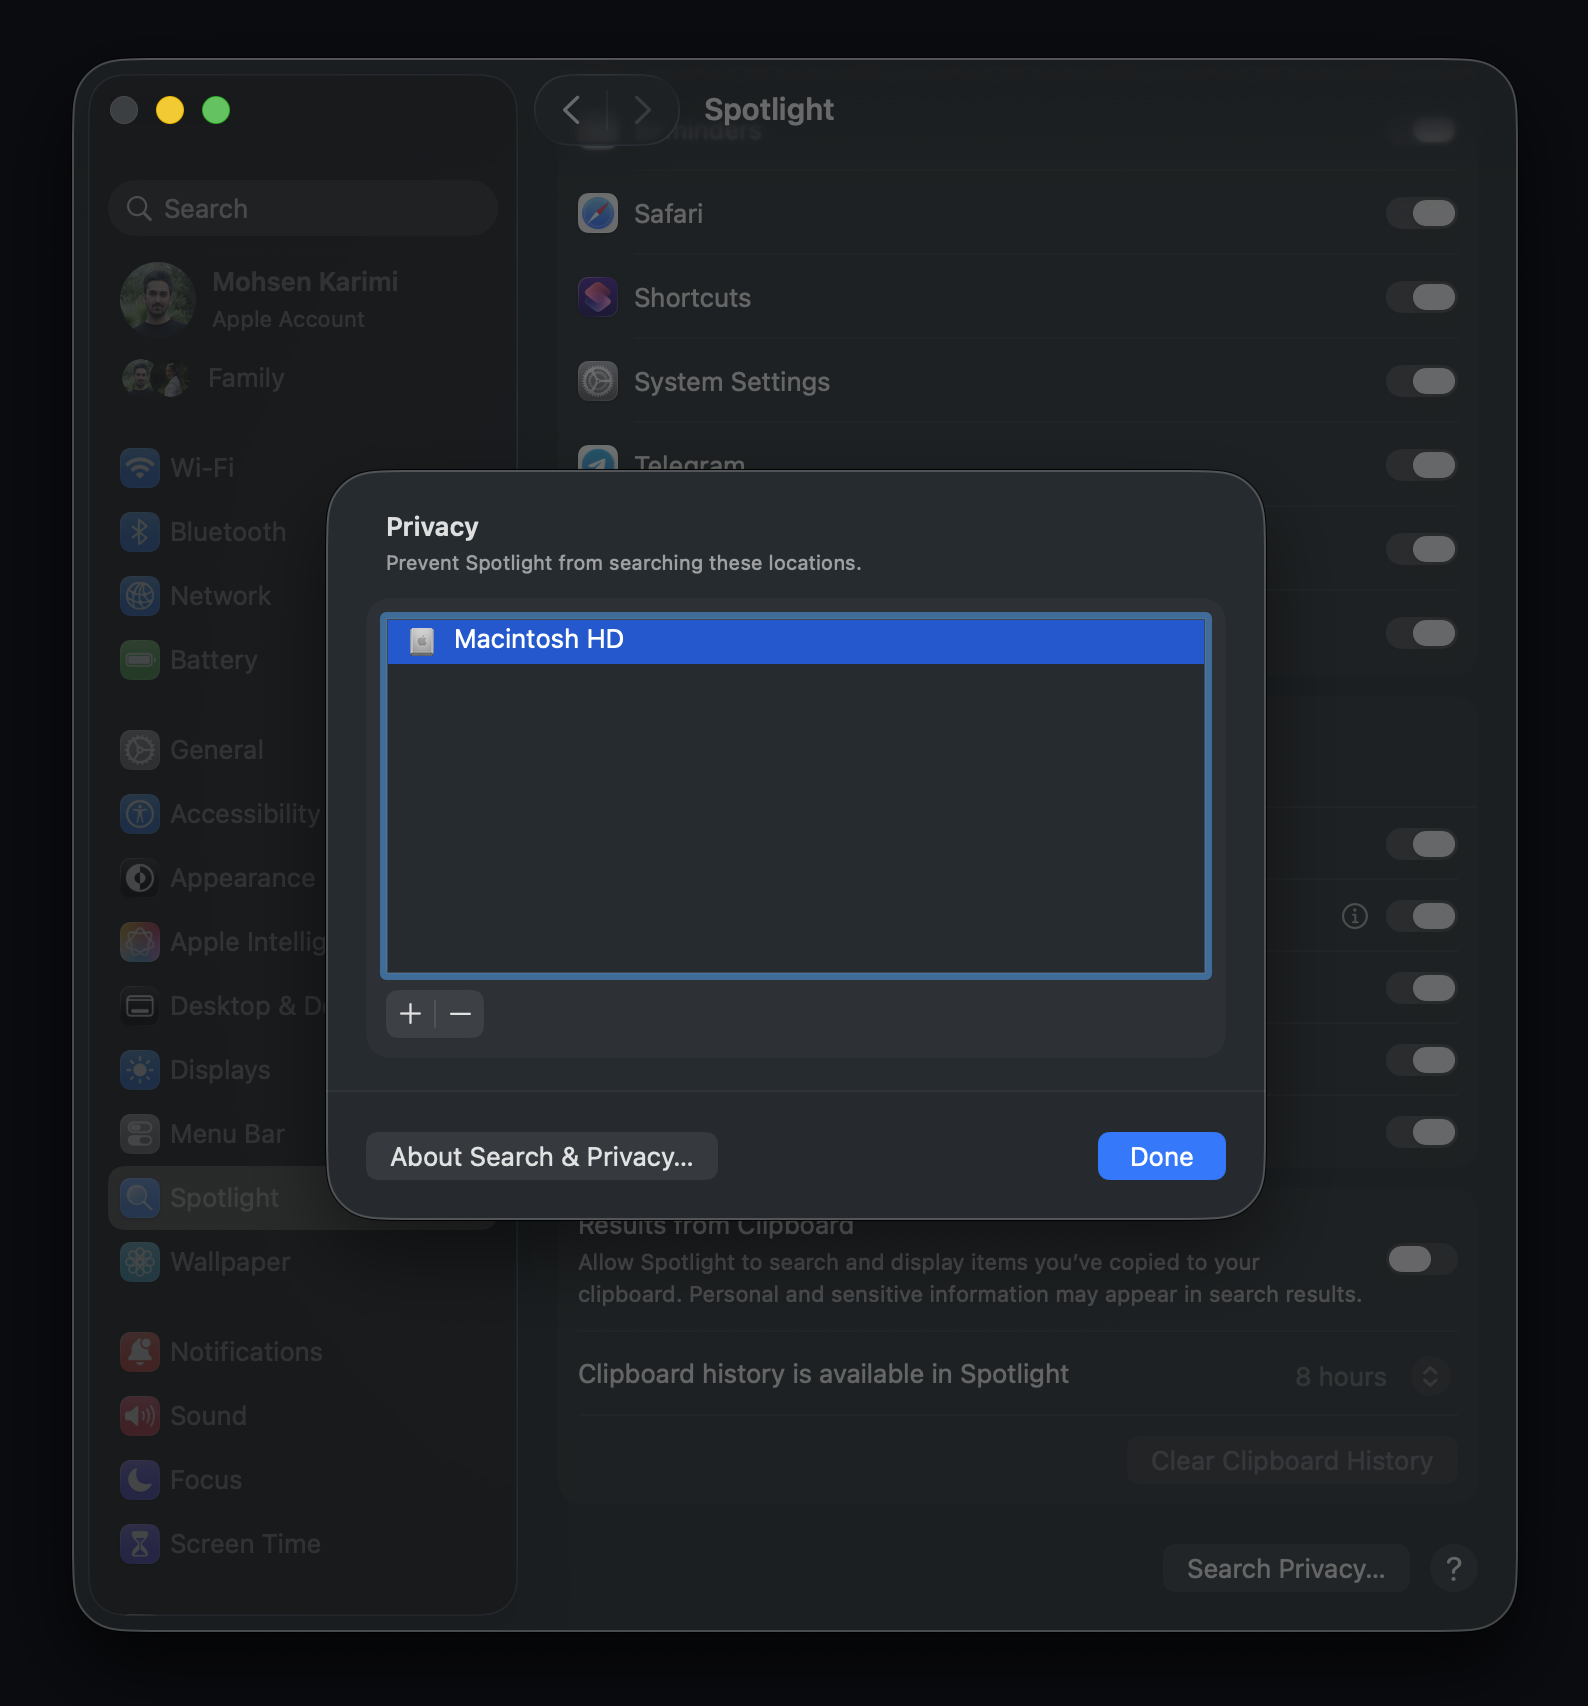
4. Click Done, then open Search Privacy again
You should now see Macintosh HD in the list. Click Done, wait a few seconds, and reopen Search Privacy.
5. Remove the disk from the list
Select Macintosh HD and click –, shown by arrow 2 above. Then click Done and quit System Settings.
The screenshot below shows the result: Macintosh HD is no longer listed. If you had other exclusions before starting, leave those in place.
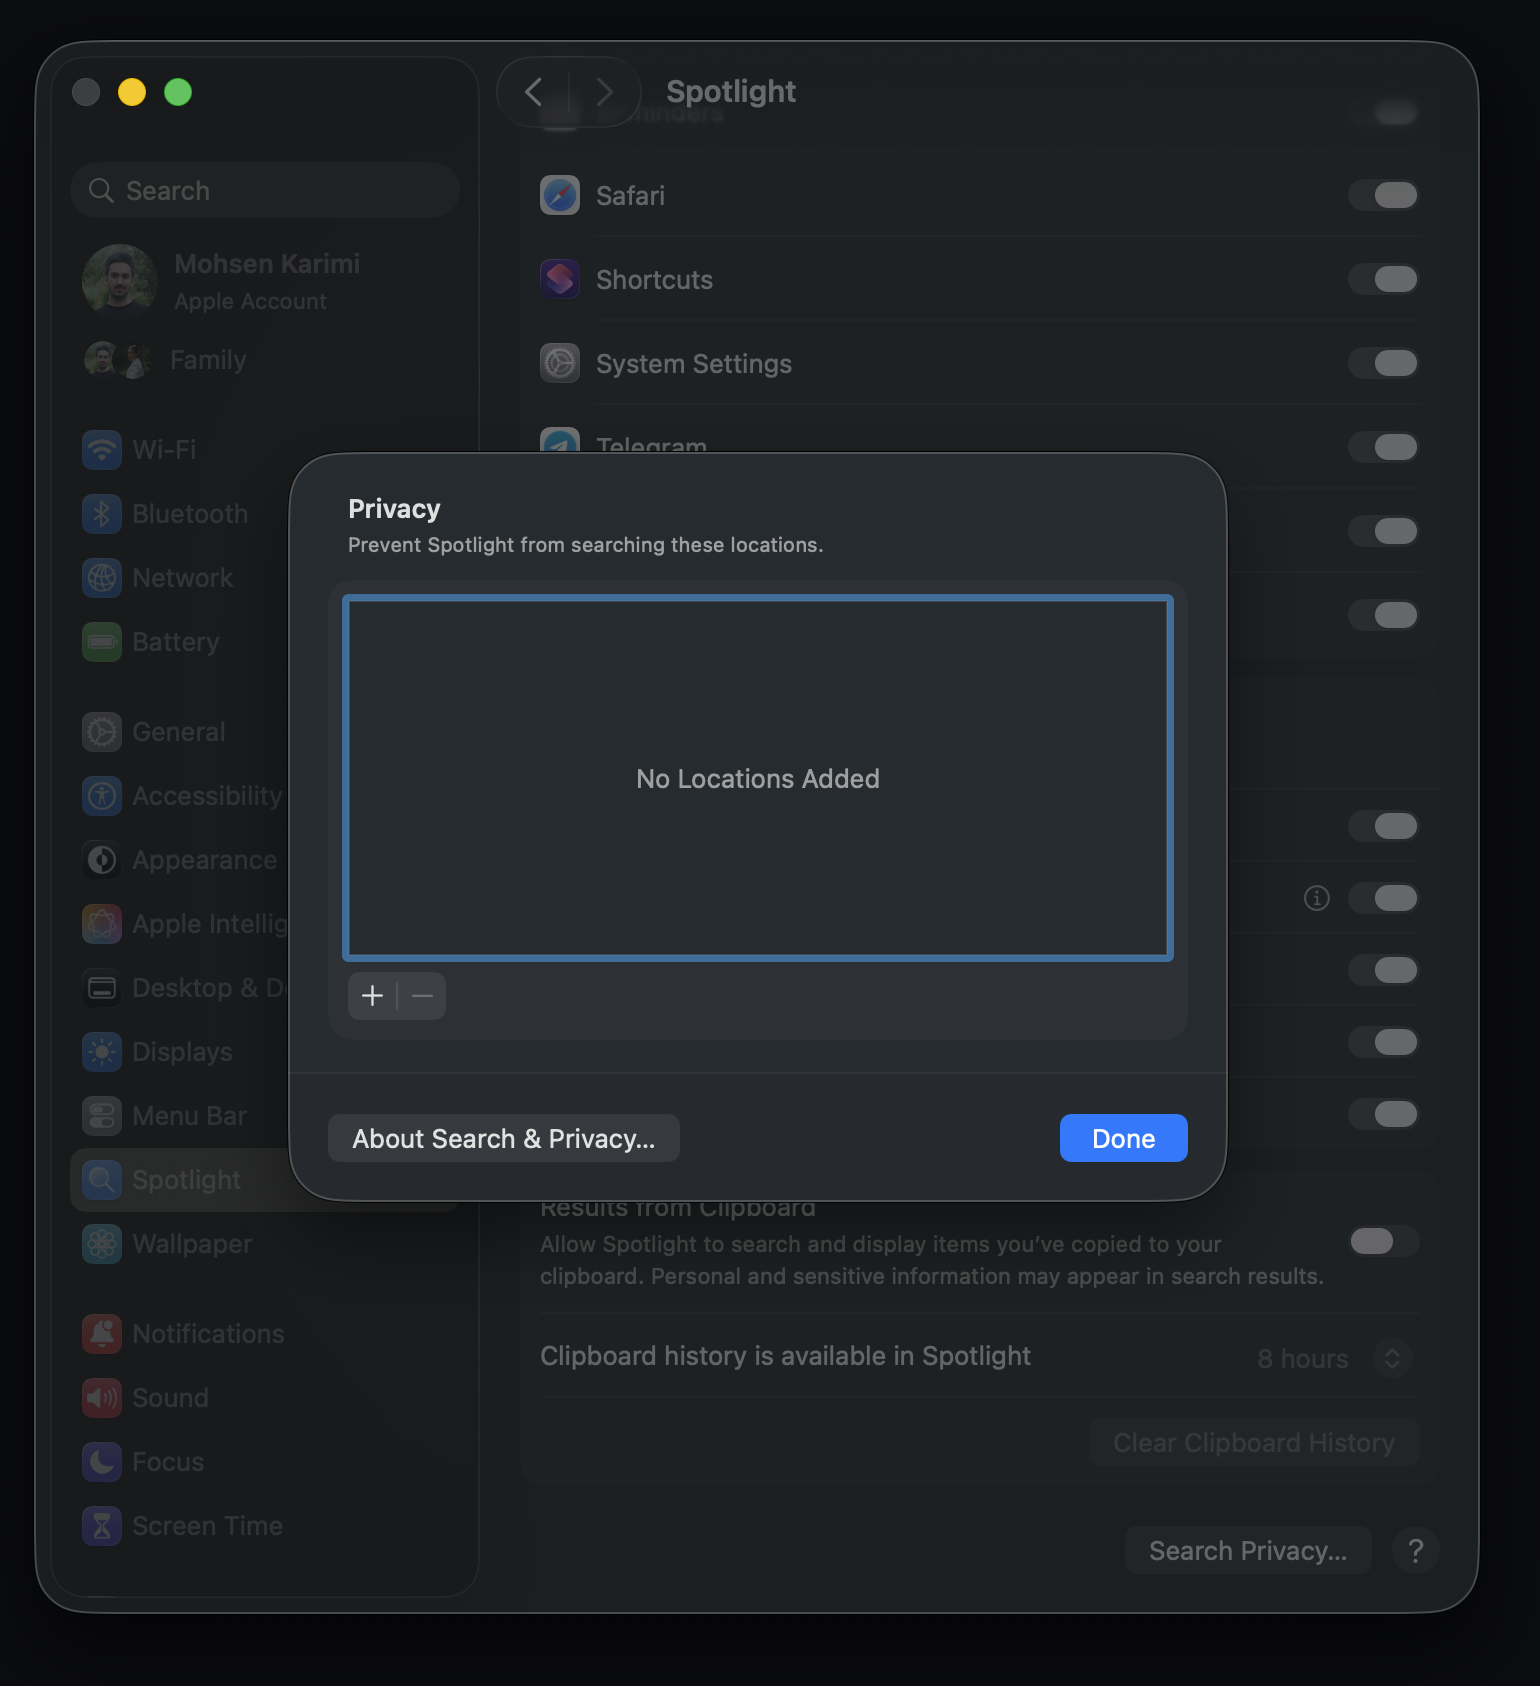
Don't stop after adding it. The list means “don't search here.” Removing the entry allows Spotlight to search there again; it doesn't delete the folder or its files. More about excluded locations.
The rebuild comes from adding and then removing the location, as described in Apple's rebuild steps.
6. Give Spotlight time to rebuild
Press Command + Space and try a search. You may see Indexing… and a progress bar, like the one below.
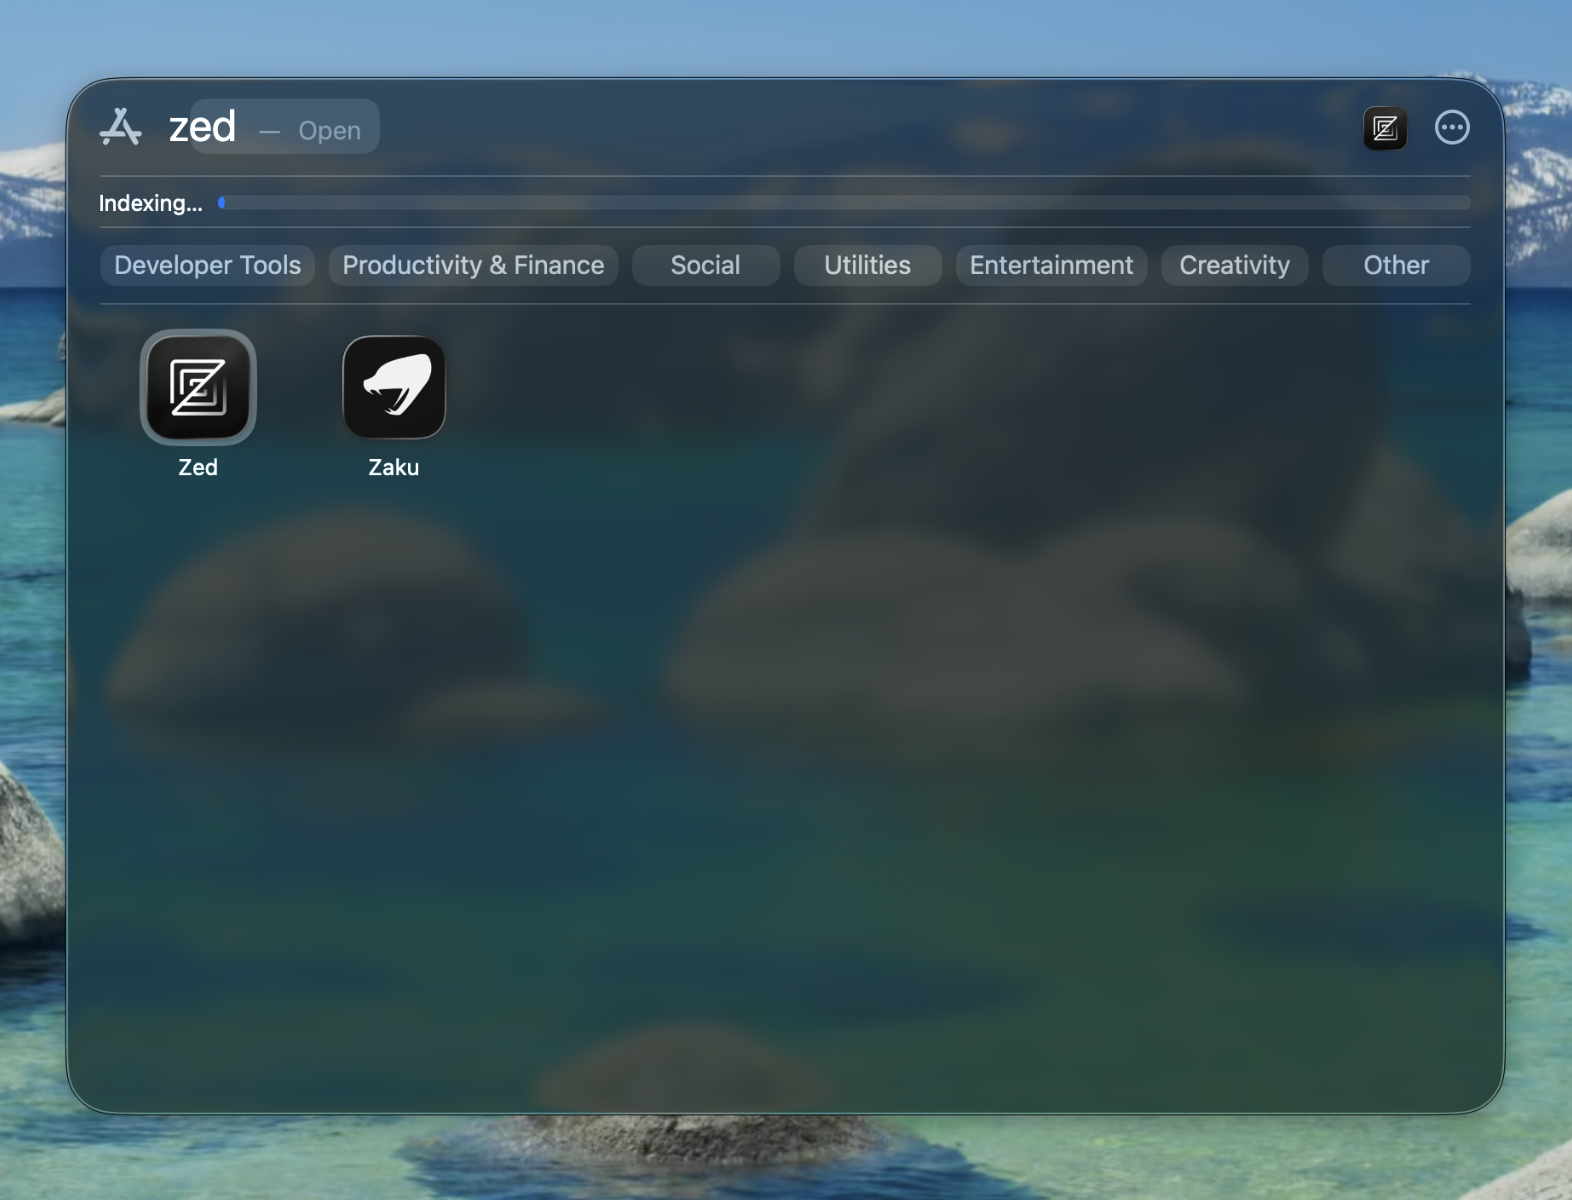
The clicks are quick; indexing can take hours, or even days with lots of data. Updates can also trigger indexing. Leave your Mac plugged in, connected to the internet, and idle when possible. Apple's indexing guidance.
Later, search for a familiar file again. I'd use something with a distinctive name, so it's easy to tell whether it's back.
Still getting nothing?
Check for a macOS update in System Settings → General → Software Update. Apple recommends installing the latest updates for search issues. If the rebuild hasn't helped after giving it time, contact Apple Support with your macOS version and an example of a missing result.
An empty search alone doesn't tell us which bug, setting, or indexing problem caused it. This is a troubleshooting step, not a guaranteed cure for a particular macOS release.
For now, open the file directly in Finder when you know where it lives. At least you can get back to what you were doing.